Tuesday 19 May 2015

Bedroom love...

I have finally gotten around to finishing this bedroom for my gorgeous girl, and I love how much my sweet girl loves her bedroom!

I received so much love on Instagram for this room, and have had questions around where items are from...so I thought I would do a little round up of some of the lovely items, that turned a room into a gorgeous bedroom for my little girl.  I hope you love as much as we do!
Wall decals are from Sticker Worx I purchased mine via eBay
Bed and Chest of draws are from Fantastic Furniture
Easter Egg Garland (on mirror) is from Woolworths

Bedside Draw/Side table I purchased sometime ago, but similar one is available here at Kmart
Heart Fairy Lights (wrapped around bedhead) are from Kmart

 Aqua Dipped Stool, Faux Fur Rug, Bedspread, Cushions (Sun and Rain Cloud), Heart light and Artwork all from Kmart
Letter 'E' from Typo
Pink Polka Dot Cushion from Pillow Talk
 
If I have missed anything or you have any questions or comments, I would love to hear from you! xx

Thursday 14 May 2015

This weeks finds...Kmart

Kmart's 'Bring the bright home' catalogue is filled with so much loveliness!! I, myself will be making a stop after work, and hopefully those shelves won't be empty by the time I get there!  The catalogue starts today and runs through until Wednesday 3rd June, 2015.  Click here to take you directly to the Kmart 'Bring the bright home' catalogue.  
 
I thought I would share some of my picks from the catalogue, but seriously it is all so lovely! We all know that these goodies at Kmart don't always last...run don't walk people!
 
a. Roomates Jhye Bed Pack $25
b. Wooden Table Lamp $20
c. Roomate Teah Rose Bed Pack $25
d. Knitted Ottoman - Natural $29
e. Round Wire Basket - Copper $12
f. Homemaker Basket Knit Throw $25
g. Casual Chair $49
h. Knitted Ottoman $29
 

i. Homemaker 3 Tier Trolley $19
j. Homemaker Laundry Sorter $25
k. Homemaker D/QB Jacquard Wool Blend Blanket $35
l. Homemaker Salle De Bain Foot Towel (2pk) $12
m. Homemaker Salle De Bain Storage Hamper $7
n. Homemaker Salle De Bain Bath Towel $10
o. Homemaker Salle De Bain 4pce Bathroom Set $9
p. Homemaker Bits and Bobs Tin $12
 
Happy shopping lovelies! xx


Tuesday 5 May 2015

Weekly Bake...Banana Bread


I had some not so pretty bananas sitting on my kitchen bench, so decided a little banana bread was in order.  I love banana bread almost as much as my kids do! They would have it for breakfast, lunch and dinner if they could so it never lasts long in our home.  I have tried so many different recipes and so far this is the best.  It's yummy, moist and best of all easy to make! 

Ingredients
1 3/4 cups self-raising flour
1/4 cup plain flour
1 teaspoon ground cinnamon
2/3 cup, firmly packed brown sugar
1/2 cup  milk
2 eggs, lightly whisked
50g butter, melted, cooled
2 overripe bananas, mashed (I use 2 large bananas, or 3 medium sized)

Method
Preheat oven to 180°C (as a rule of thumb I usually drop the temperature 20degrees when baking in a fan forced oven). Brush an 11 x 21cm (base measurement) loaf pan with melted dairy spread to lightly grease. Line the base and 2 opposite sides with non-stick baking paper, allowing it to overhang.

 
Sift the combined flours and cinnamon into a large bowl. Stir in the sugar and make a well in the centre. Place the milk, eggs, melted butter and banana in a medium bowl, and stir until well combined. Add the banana mixture to the flour mixture and stir until just combined. Spoon the mixture into the prepared pan and smooth the surface.

 
Bake in preheated oven for 45-50 minutes or until a skewer inserted into the centre comes out clean. Remove from oven and set aside in the pan for 5 minutes. Turn onto a wire rack to cool completely.


Happy Baking lovelies xx
 

Monday 4 May 2015

DIY Gold Mug...


I have been rather slack on posting for the last 2 weeks! Between sick kids, full-time work and the usual housework and study, it has been a little crazy around here, and I have really struggled to get a little me time of late.  I love Instagram for a quick, pretty photo journal of our life and home, but I love nothing more than sitting down and putting words to paper so to speak, I think that's I why I love the process of writing a blog post.  I use my 'me' time to sit and blog or work on other projects, so I am really going to try and allocate some time for me going forward, as best I can, to spend more time doing things I love...because every mama needs a little break, right?!  Now enough about me, and onto the DIY mugs...
 
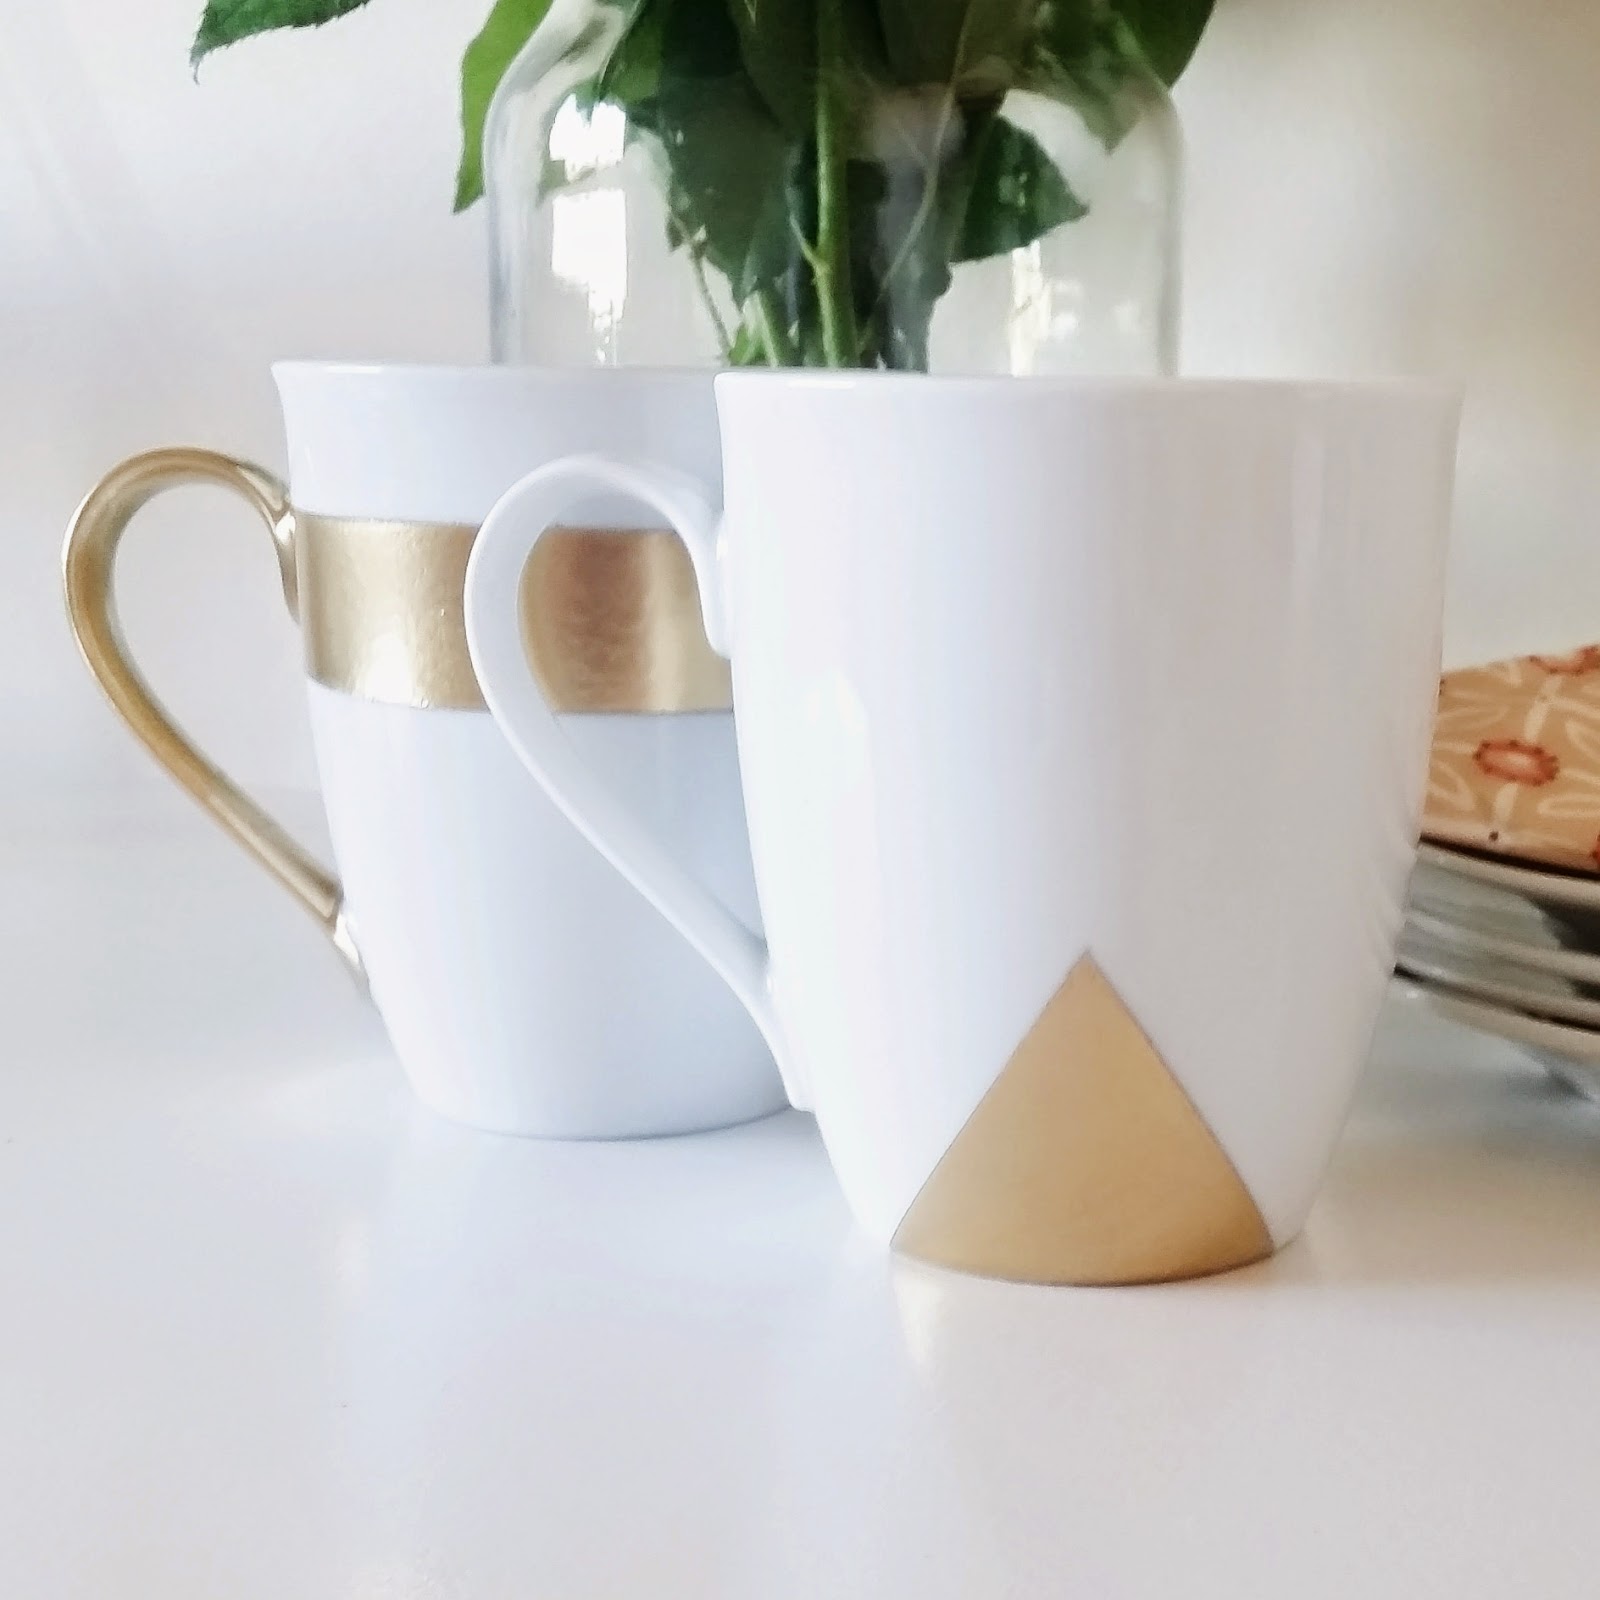
I posted my Inspiration a couple of weeks ago here and set about creating my pretty DIY mugs.  I really wanted to try a couple of different metallic finishes, like a rose gold, bronze and silver finish as well as the gold, but as I said before a crazy couple of weeks so I used what I had and that was gold.  I am so happy with the results, they look super cute! I have used them, and no chipping or scratching off, though I have only hand washed and wouldn't recommend putting these pretties in a dishwasher.  Here's how I did it...

What you'll need...

- Spray paint of your choice, I used this White Knight Metallic gold (I love the finish of this spray)
- White mug
- Painter's tape or masking tape
- Clingwrap (not pictured as it was an after thought)

 How I did it...

- Decide on the pattern you want, for this mug I did a horizontal stripe.
- You want to cover everything you don't want sprayed with painter's tape, I wanted the handle gold for this one so I left it tape free.
- Make sure to run your finger nail along the edges of the tape you want a clean, crisp line once the tape comes off.
 
 - For this one I wanted a triangle down the bottom of the mug, I marked out a triangle on both sides of the mug.

- Rather than cover the whole mug in tape for this one I tried clingwrap and taped the edges down, and it worked perfectly.
 
- I also covered the top of the mug with clingwrap so as to prevent any spray getting inside the mug.

- Now the fun bit! Spray as per the directions on the spray can
- I did one light layer and let it dry for 20min before giving it a final coat (this is important you don't want to be too heavy handed with the spray or you'll end up with run marks)
- I removed the tape about 20min (you want it to be dry to the touch) you don't want to leave the tape on longer than necessary
 
How pretty is the end result! I love this little DIY and I love that the sky is the limit when it comes to colours and patterns!

 
Happy DIYing lovelies! xx